Terminal using PuTTY#
Prerequisite#
To access KU Leuven clusters, only an approved VSC account is needed.
To access clusters hosted at these sites, you need a public/private key pair of which the public key needs to be uploaded via the VSC account page.
To access clusters hosted at these sites, you need a public/private key pair of which the public key needs to be uploaded via the VSC account page.
To access clusters hosted at these sites, you need a public/private key pair of which the public key needs to be uploaded via the VSC account page.
Installation#
PuTTY is a Windows program that has to be installed on your computer. Open
PuTTY’s download page
and download the Package file that corresponds to your system (usually 64-bit
x86). Once the download completes, execute the downloaded .msi installer.
The installer will guide you through the rest of the installation.
Connecting to VSC clusters#
When you start the PuTTY executable ‘putty.exe’, a configuration screen pops up. Follow the steps below to setup the connection to (one of) the VSC clusters.
Warning
In the screenshots, we show the setup for user vsc98765 to a
Tier-2 cluster at KU Leuven via the login node login.hpc.kuleuven.be.
Please keep in mind to:
replace
vsc98765with your own VSC user namereplace
login.hpc.kuleuven.bewith the name of the login node of the VSC cluster you want to access, which can be found in the cluster description on Tier-1 Infrastructure or Tier-2 Infrastructure
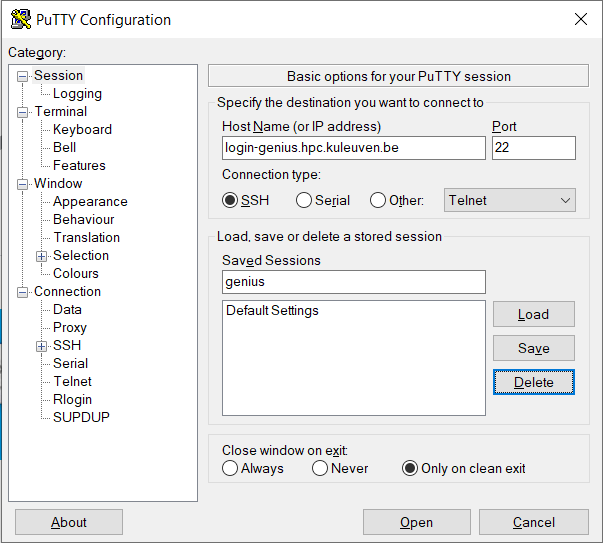
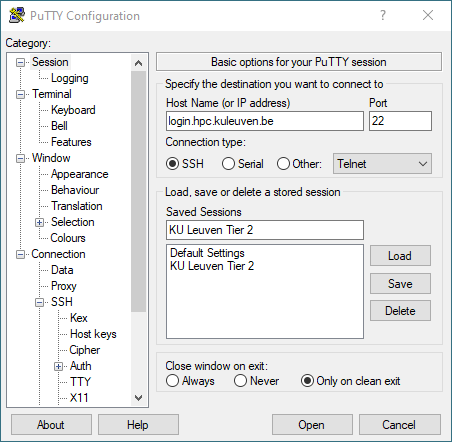
Within the category ‘Session’, in the field ‘Host Name’, type in a valid hostname of the Tier-1 or Tier-2 VSC cluster you want to connect to.
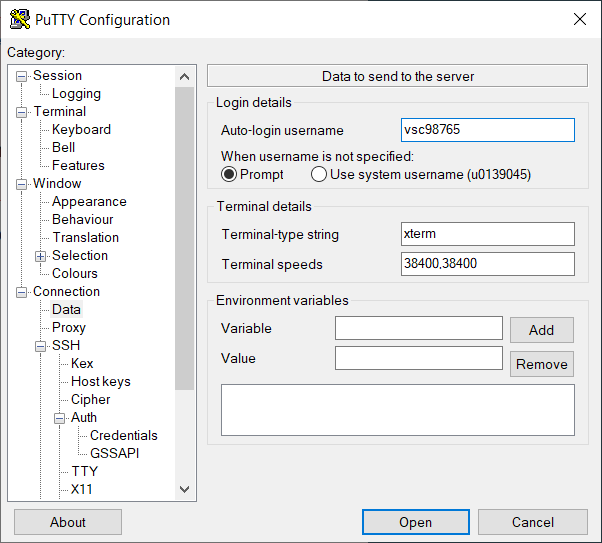
In the category Connection > Data, in the field ‘Auto-login username’, put in <vsc-account>, which is your VSC username that you have received by mail after your request was approved.
Based on the destination VSC site that you want to login to, choose one of the tabs below and proceed.
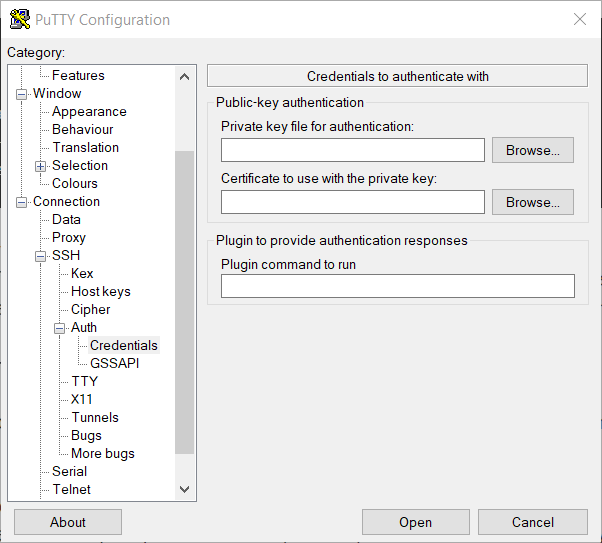
Select the SSH > Auth > Credentials tab, and remove any private key from the box ‘Private key file for authentication’.
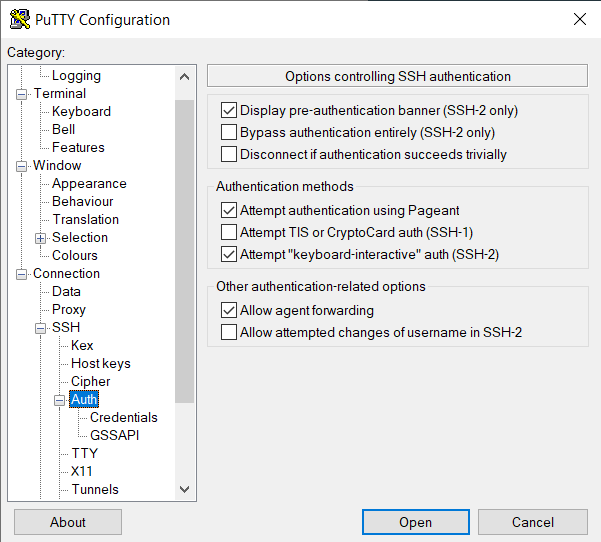
In the category Connection > SSH > Auth, make sure that the option ‘Attempt authentication using Pageant’ is selected. It is also recommended to enable agent forwarding by ticking the ‘Allow agent forwarding’ checkbox.
In the category Connection > SSH > Auth > Credentials, click on ‘Browse’, and select the private key that you generated and saved above.
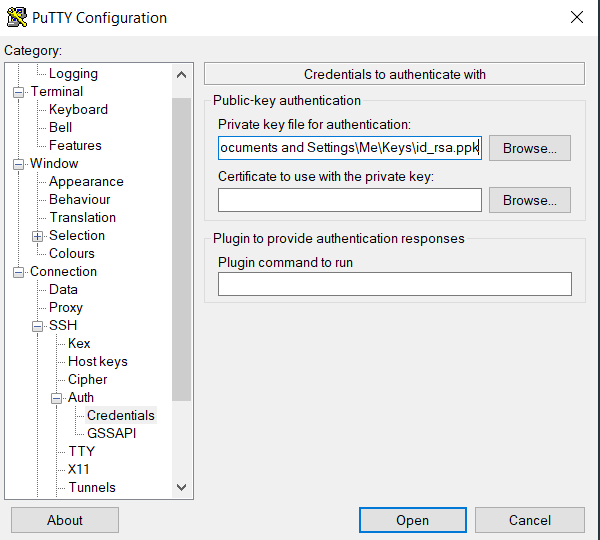
Here, the private key was previously saved in the folder
C:\Users\Me\Keys. In older versions of Windows, you would have to useC:\Documents and Settings\Me\Keys.In the category Connection > SSH > Auth > Credentials, click on ‘Browse’, and select the private key that you generated and saved above.
Here, the private key was previously saved in the folder
C:\Users\Me\Keys. In older versions of Windows, you would have to useC:\Documents and Settings\Me\Keys.In the category Connection > SSH > Auth > Credentials, click on ‘Browse’, and select the private key that you generated and saved above.
Here, the private key was previously saved in the folder
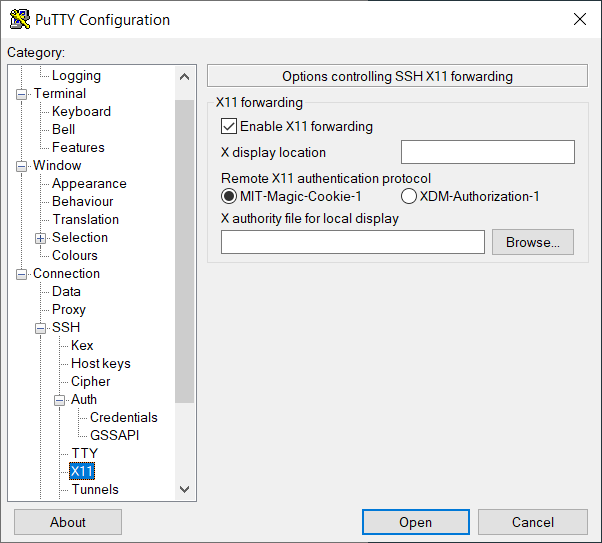
C:\Users\Me\Keys. In older versions of Windows, you would have to useC:\Documents and Settings\Me\Keys.In the category Connection > SSH > X11, click the ‘Enable X11 Forwarding’ checkbox:
Now go back to the ‘Session’ tab, and fill in a name in the ‘Saved Sessions’ field and press ‘Save’ to permanently store the session information.
To start a session, load it from Sessions > Saved Sessions, and click ‘Open’.
You will be then prompted to copy/paste the firewall link into your browser and complete the Multi Factor Authentication (MFA) procedure. With PuTTY, users only need to highlight the link with their mouse in order to copy it to the clipboard.
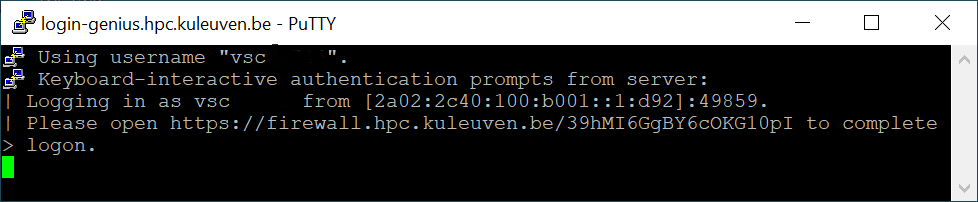
Then, with the right-click from your mouse or CTRL-V, you can paste the MFA link into your browser to proceed with the authentication to
login.hpc.kuleuven.be.Now pressing ‘Open’ should ask for your passphrase, and connect you to
login.hpc.uantwerpen.be.Now pressing ‘Open’ should ask for your passphrase, and connect you to
login.hpc.ugent.be.Now pressing ‘Open’ should ask for your passphrase, and connect you to
login.hpc.vub.be.
The first time you make a connection to the login node, a Security Alert will appear and you will be asked to verify the authenticity of the login node.

For future sessions, just select your saved session from the list and press ‘Open’.
Managing SSH keys with Pageant#
At this point, we highly recommend setting up an SSH Agent. A widely used SSH agent is Pageant which is installed automatically with PuTTY.
Pageant can be used to manage SSH keys and certificates for multiple clients, such as PuTTY, WinSCP and FileZilla, so that you don’t need to enter the passphrase all the time.
Proxies and network tunnels to compute nodes#
Network communications between your local machine and some node in the cluster other than the login nodes will be blocked by the cluster firewall. In such a case, you can directly open a shell in the compute node with an SSH connection using the login node as a proxy or, alternatively, you can also open a network tunnel to the compute node which will allow direct communication from software in your computer to certain ports in the remote system. This is also useful to run client software on your Windows machine, such as a Jupyter server running on a compute node.
Troubleshooting PuTTY connection issues#
If you have trouble accessing the infrastructure, the support staff will likely ask you to provide a log. After you have made a failed attempt to connect, you can obtain the connection log by
right-clicking in PuTTY’s title bar and selecting Event Log.
In the dialog window that appears, click the Copy button to copy the log messages. They are copied as text and can be pasted in your message to support.