JupyterLab#
With this app you can write and run Jupyter notebooks containing annotated Python, R, Julia and Bash code (among other languages). IPython consoles are available as well. One of the benefits of JupyterLab is that it supports different types of user-defined environments, as will become clear below. The included plugins are additional assets in the notebook environment (as elaborated below).
By default, your top-level notebook directory points to $VSC_DATA. You can
switch to other available cluster storage (such as scratch) by entering the
full path into the ‘Working directory’ text field.
The top-level notebook directory is the selected ‘Working directory’ in
the resources form. Note however, if you have set c.ServerApp.root_dir
in your Jupyter configuration file
(default = ~/.jupyter/jupyter_server_config.py), this config will take
priority over your ‘Working directory’ in the resources form.
Pure module environment#
In the resources form, besides the shared resources,
you can also choose between different ‘Toolchain and Python versions’ from a
drop-down menu. At the moment, we support the most recent toolchains starting from
2023a up to 2025a. An example would be ‘2025a and
Python/3.13.1-GCCcore-14.2.0’. Based on that choice, the corresponding
JupyterLab module will be loaded together with its dependencies (such as the
listed Python module).
Furthermore, you may choose to tick one of the checkboxes to load popular
modules from the same toolchain, such as SciPy-bundle (for widely used
packages like scipy, numpy, pandas and more) and/or matplotlib.
A large number of widely used Python packages are already available by default. The following modules are always loaded with JupyterLab:
Python-bundle-PyPI- packages for general usageScipy-bundle- data science packages likescipy,numpy,pandasmatplotlib- plotting library and Matplotlib Lab extension
A large number of widely used Python packages are already available by default. The following modules are always loaded with JupyterLab:
Python-bundle-PyPI- packages for general usageScipy-bundle- data science packages likescipy,numpy,pandasmatplotlib- plotting library and Matplotlib Lab extension
If you need additional Python packages, you can load extra modules with Python
packages via module load commands in the ‘Pre-run Scriptlet’ of the
resources form, or via the Software modules Lab extension in your JupyterLab
session (if supported by the OnDemand portal).
After launch, the Python 3 (ipykernel) kernel is automatically available in
your JupyterLab session. Along with the standard Python library, it also gives
you access to Python packages from any modules that are loaded by default or in
the ‘Pre-run Scriptlet’ of the resources form.
Warning
If you use JupyterLab in the pure module environment, remember to be consistent in your choice of toolchain version as this determines the versions of Python and Python packages that will be used.
Jupyter kernels#
VSC clusters that support different Jupyter kernels:
The following table shows the kernels available in JupyterLab and the corresponding modules that have to be loaded to enable them:
Kernel |
Software Module |
|---|---|
Python |
(loaded by default) |
R |
|
Julia |
|
The default lab environment only loads the Python kernel upon launch. You can activate any other kernel by loading its corresponding software module. Once a module providing a new kernel is loaded, a new icon will automatically appear on your lab launcher page to start a notebook with that kernel.
User-defined kernels#
If the available modules in the pure module environment do not provide all Python packages that you need, then you can locally install these extra packages, followed by installing the corresponding Jupyter kernel either from a Conda environment, or from a Python virtual environment. For R, you may create your customized environment using Conda environments for R.
Note
User kernels are stored by default in ${VSC_HOME}/.local/share/jupyter/kernels.
To override this and store your kernel specifications in a non-default location,
you may drop the following line in your ${VSC_HOME}/.bashrc:
export XDG_DATA_HOME=${VSC_DATA}/.local/share
When the ${XDG_DATA_HOME} variable is set, subsequent kernel installations
(for both Python and R) will reside in ${XDG_DATA_HOME}/jupyter/kernels.
To remove a kernel, find and delete the corresponding folder inside the kernels
subdirectory.
We strongly advice against modifying the contents of this folder, unless you
are aware of the consequences.
Conda environments for Python#
Assuming you have created a Conda environment for Python, the corresponding kernel needs to be installed for use with JupyterLab. If you have not used Conda before, please take a look at the Conda-based environment managers page.
Activate the Conda environment that you want to configure for use with
JupyterLab and then install the ipykernel package and the kernel itself:
source activate <env_name>
conda install ipykernel
python -m ipykernel install --user --env PYTHONPATH "" --name <env_name> --display-name <kernel_name>
These commands should be executed from a shell (e.g. using ‘Login (Server) Shell Access’), and only need to be done once for a given environment. When launching a new JupyterLab session, this kernel should then show up in the overview of available kernels, and as a new tile under the ‘Notebook’ section when opening a new launcher.
Notes
The minimum supported Python version is Python 3.7.
The minimum supported ipykernel version is ipykernel 6.19.2.
Tip
In case you encounter issues such as freezing or crashing JupyterLab sessions with a previously existing kernel, then reinstalling that kernel may help.
Virtual environments for Python#
You can use Python virtual environments to generate custom kernels for your notebooks. Virtual environments provide a layer of isolation allowing users to install additional Python packages on top of the software modules without conflicts.
Before using a virtual environment from the lab interface, consider the following requirements:
The chosen Python module needs to be in the list of ‘Toolchain and Python versions’ of the JupyterLab form (e.g.
2023a and Python/3.11.3-GCCcore-12.3.0).When using a virtual environment, the same software modules must be loaded as those that were loaded when creating it.
A virtual environment is only guaranteed to work in the same CPU micro-architecture as the one it was created on.
KU Leuven We recommend to consider the suggestions in the wICE advanced guide.
Open the Terminal from your lab interface, ensuring that the requirements listed above are met.
Follow the instructions in Managing Python virtual environments with pip to create a new virtual environment and install any Python packages in it. Keep in mind that loading the Python module is not necessary as that is already done by the JupyterLab session. This new virtual environment can be placed anywhere you like in the storage of the cluster.
The example code below creates a new virtual environment in the venv-zen4 directory:
$ python3 -m venv venv-zen4 --system-site-packages
$ source venv-zen4/bin/activate
(venv-zen4) $ python3 -m pip install --upgrade pip
(venv-zen4) $ python3 -m pip install <insert_cool_package>
Add your new virtual environment as a new Jupyter kernel (from the same terminal shell)
$ python3 -m pip install ipykernel
$ python3 -m ipykernel install --user --name=venv-zen4
A new launcher will appear in the lab interface to start notebooks using this new virtual environment
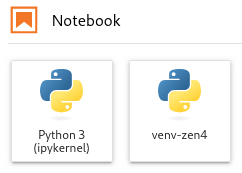
Fig. 3 Launchers for default Python kernel and custom Python kernel from virtual environment#
To verify your setup, you can execute import sys; sys.executable in the new
kernel notebook, and the resulting path should point to the location of your
virtual environment.
Conda environments for R#
For R, you need both the jupyter_client and the irkernel Conda packages installed.
With the following command you can create the kernel:
Rscript -e 'IRkernel::installspec(name="<env_name>", displayname="<kernel_name>")'
Once the kernel is created, you will see it in the ‘Launcher’ menu. You can now start working in your own customized environment.
For more general information, please refer to the official JupyterLab documentation.
JupyterLab extensions#
JupyterLab extensions enhance or customize your JupyterLab session. You can find the list of available extensions in the extension tab on the left panel (puzzle piece icon) and you can enable or disable any of them.
Note
The JupyterLab extensions store is disabled because the available extensions in the store are not reviewed and may contain malicious or malfunctioning software. If you need any JupyterLab extension that is not yet available, please contact your site admins.
Software modules Lab extension#
The ‘Software Modules’ JupyterLab extension allows you to load additional software modules within JupyterLab without relaunching your JupyterLab session. This provides a more flexible alternative to loading modules via the ‘Pre-run Scriptlet’ in the resources form.
VSC clusters that support the ‘Software Modules’ Lab extension:
The ‘Software Modules’ Lab extension is enabled by default in your JupyterLab session. You can load software modules from the tab with a hexagon icon on the left panel of JupyterLab. This tab shows a long list of modules: the loaded modules at the top, and below that, a list of available modules.
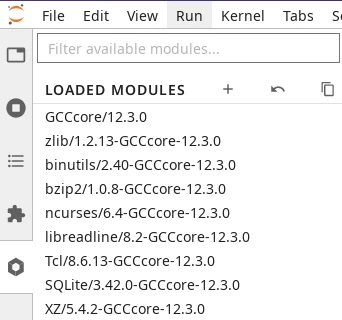
Fig. 4 Software Modules Lab extension#
Upon launch, the list of loaded modules will already show some modules that have been loaded by JupyterLab itself. For example, you will always see a Python module loaded, which determines the Python version of the kernel used by your Python notebooks on this session.
Warning
Modules already loaded when your JupyterLab environment starts are necessary for the correct function of the lab and notebooks. They should not be unloaded.
Below the loaded modules, you will find the list of available modules that can be loaded on-demand. Move your mouse pointer to the right of the module name and a Load button will appear (see screenshot on the right).
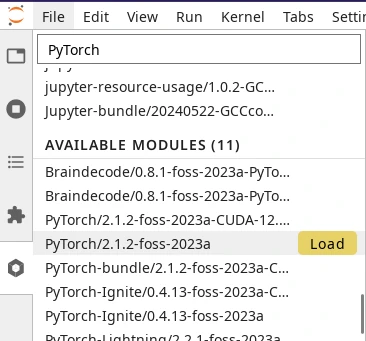
Fig. 5 Loading a module in the Software Modules Lab extension#
Note
Any change to the list of loaded modules requires rebooting the kernel of
your open notebooks. After loading/unloading modules, click the kernel at the
top-right of the notebook toolbar, (default = Python 3 (ipykernel)) in the
screenshot below, and re-select your notebook kernel from the menu.

Fig. 6 Notebook toolbar with default Python kernel#
Matplotlib Lab extension#
The matplotlib JupyterLab extension
(ipympl) enables the interactive features of matplotlib in your JupyterLab
session.
VSC clusters that support the matplotlib Lab extension:
To activate the Lab extension in your notebook, use the %matplotlib ipympl or
%matplotlib widget magic command. To ensure your plot is always shown, make
sure to generate a figure object before plotting, e.g. with plt.figure() or
plt.subplots().
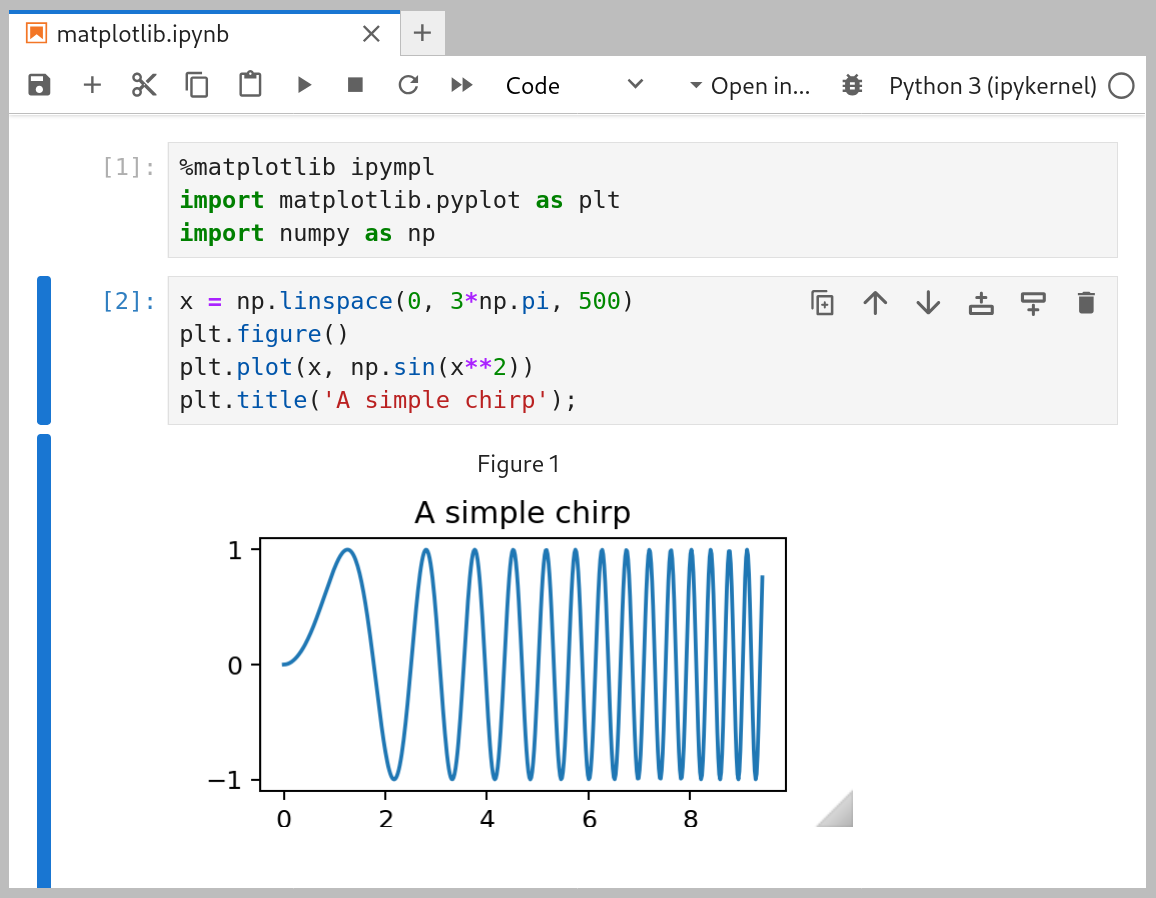
Fig. 7 matplotlib Lab extension example#
Dask Lab extension#
The Dask JupyterLab extension (dask-labextension) provides tools to manage Dask clusters and embed Dask’s dashboard plots directly into your JupyterLab session.
VSC clusters that support the Dask Lab extension:
In the resources form, tick the ‘Load the dask module’ checkbox to make sure the Dask Lab extension is loaded before starting JupyterLab.
In your new JupyterLab session, open a Jupyter notebook or start a new one.
In the ‘Settings’ menu, select ‘Auto-Start Dask’.
Click the Dask icon on the left side of the JupyterLab window.
In the ‘Clusters’ pane of the ‘Dask’ tab, click the ‘+New’ button to fire up a Dask cluster and connect your notebook to it. The default cluster is a LocalCluster, which is suited for single-node calculations.
You can now click any of the yellow-colored bars to open the corresponding Dask dashboard. Once opened, you can drag-and-drop it anywhere you want, and you can open multiple dashboards in the same session. Some useful Dask dashboards include ‘Cpu’, ‘Cluster Memory’, ‘Task Stream’, and ‘Workers’.
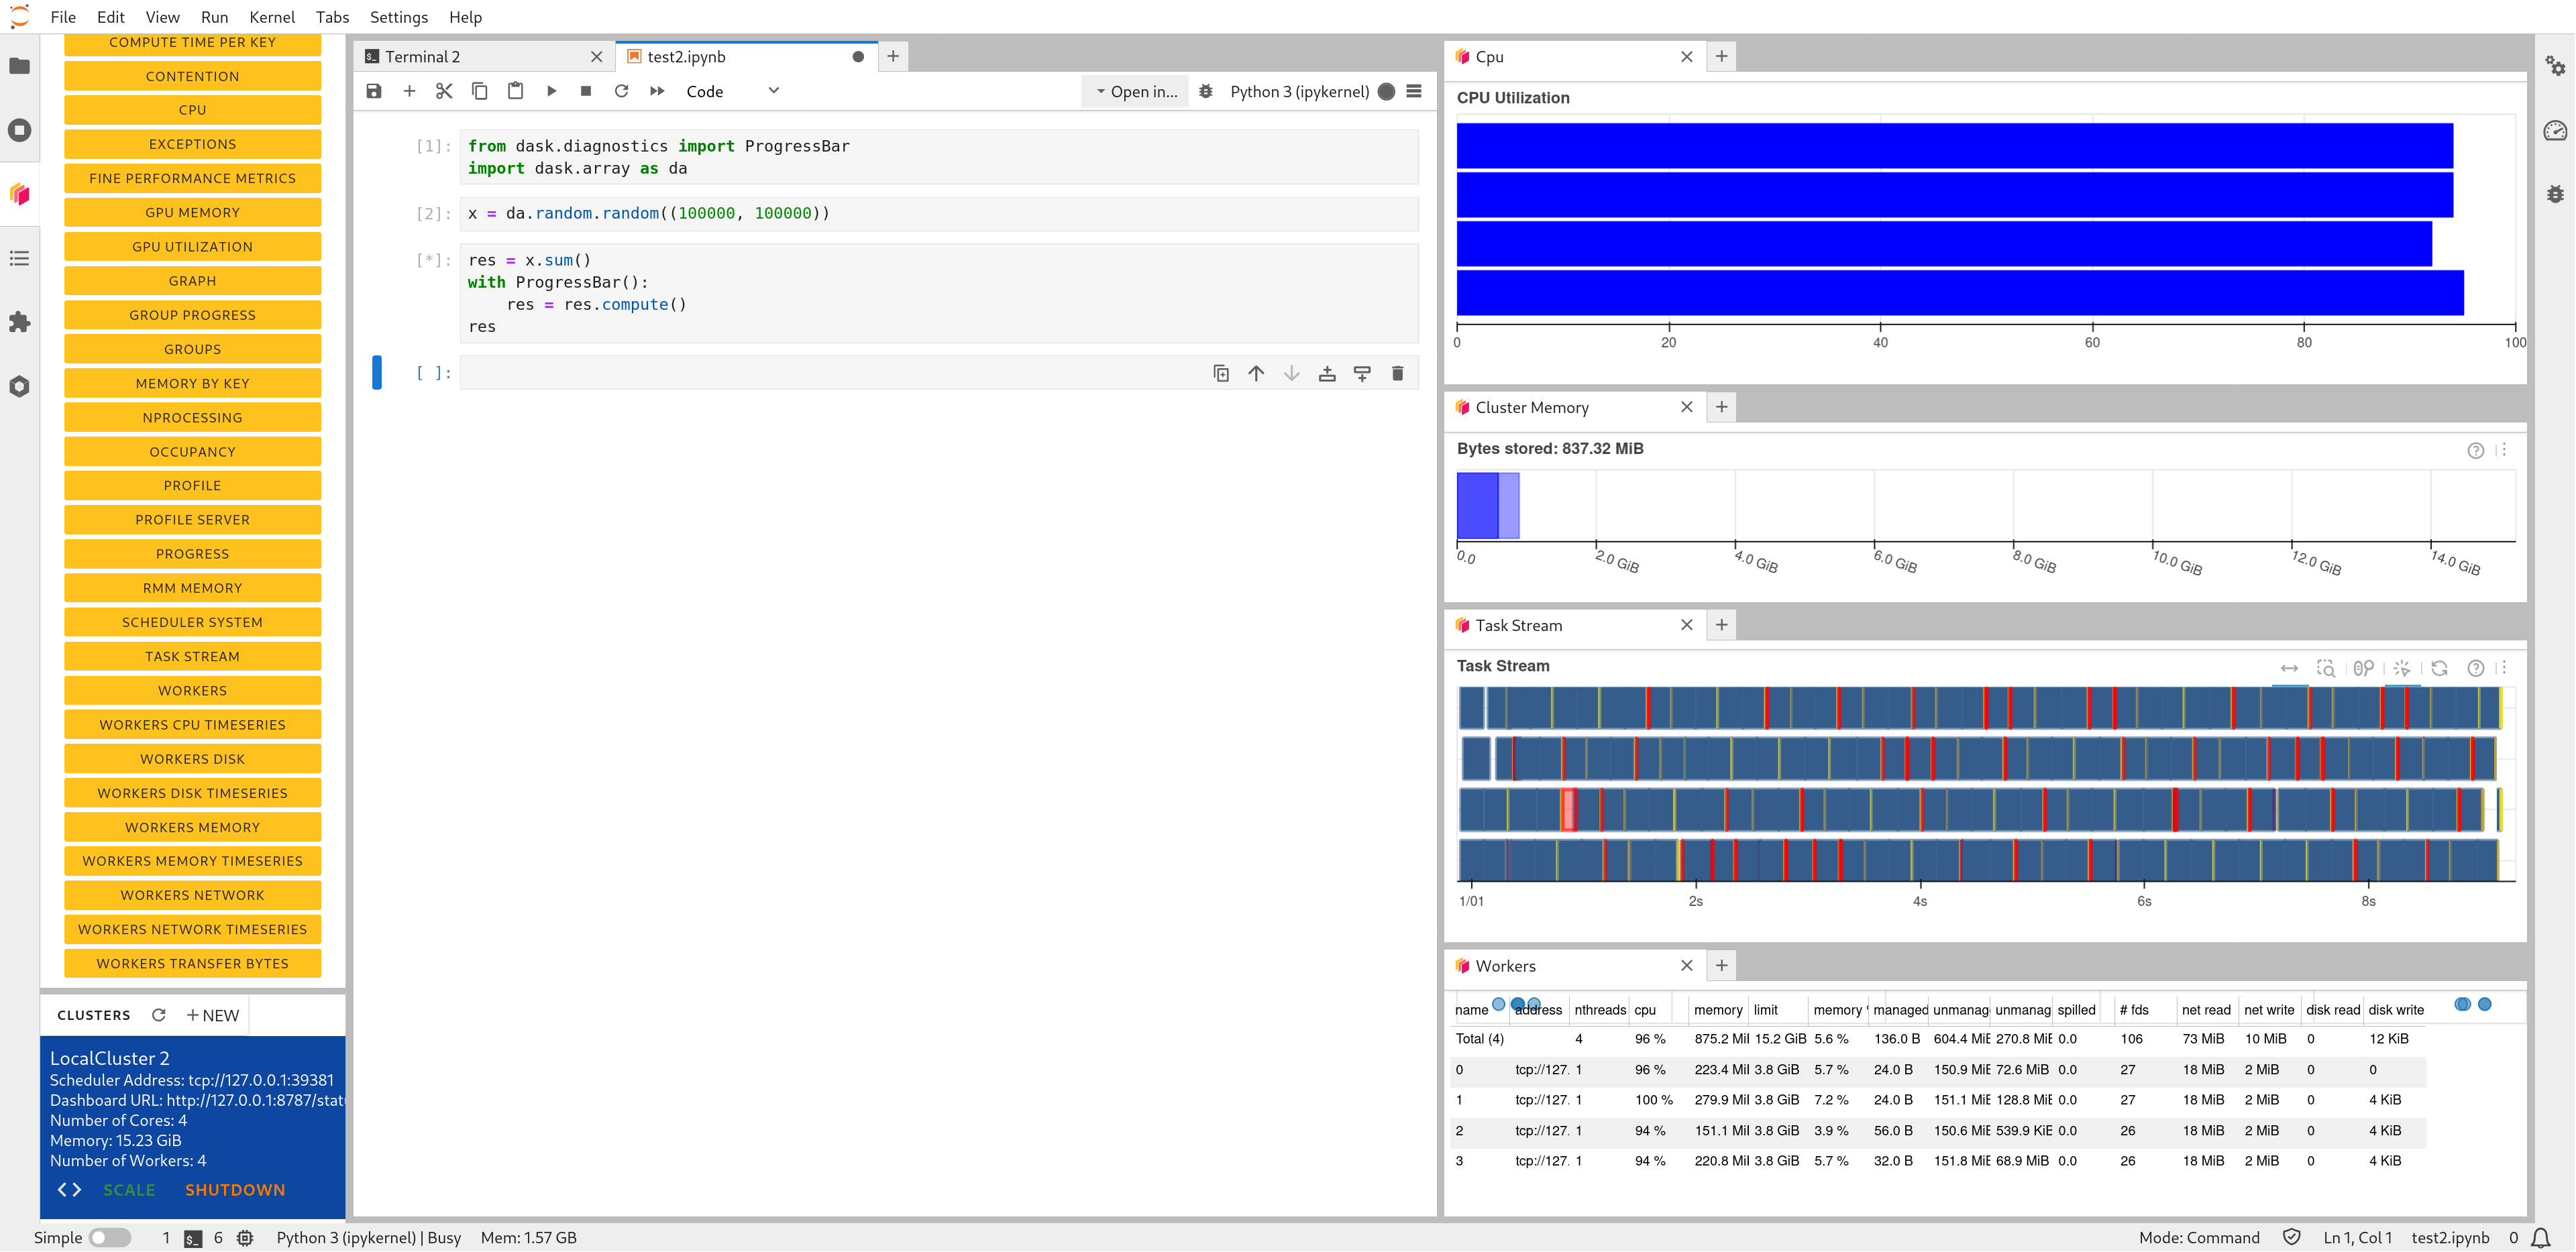
Fig. 8 Dask Lab extension in action#
Bash kernel extension#
Despite the fact that Jupyter notebooks are best known for running Python, R and Julia code, it is also possile to execute Bash commands inside your notebook if your Jupyter kernel is well integrated with the underlying Bash kernel of your operating system. VSC clusters that support the Bash kernel extension:
By default, the ‘Bash’ kernel is loaded in your environment, starting from the 2023a toolchain. To use it in a notebook, you need to choose the ‘Bash’ or ‘Python 3 (ipykernel)’ jupyter kernels which appear automatically among your list of kernels.
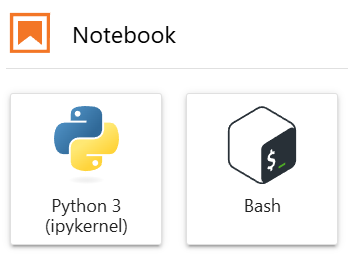
Fig. 9 Jupyter Bash kernel#
Note
If you have loaded additional modules via the ‘Pre-run scriptlet’, you have to choose the ‘Python 3 (ipykernel)’ as your Jupyter kernel. Only then, the Bash kernel and additional packages from the loaded module(s) are all exposed in your notebook environment.
Jupyter resource usage extension#
When prototyping, debugging and testing your application, it is crucial to have a realistic estimate of resource utilization at runtime. More specifically, monitoring CPU usage can help debugging parallel code blocks, and monitoring the memory usage can help estimating the lower bound of memory resources needed for your application.
Starting from the 2023a toolchain, you may inspect the aggregated CPU and memory resource usage by your kernel. This is shown in your bottom tray (for CPU and memory), in the top tray (for memory) and in the right sidebar of your Notebook (for a summary). The VSC clusters that support this extension are:
To monitor the host CPU and memory utilization at runtime, click on the ‘Kernel Usage’ tab on the right tray. Among the various fields, you may like to keep eye on the ‘CPU’ and ‘Memory’ metrics for aggreggated resource usage of your kernel. Then, execute the cell(s) of interest which might be resource intensive; you will see that the CPU and memory metrics are updated in real time.
JupyterLab git extension#
Version control is an integral part of software development and management of your intellectual property, with a focus on preserving the incremental changes made to the software code base. This topic is extensively explained in the Version Control Systems section.
Similar to many modern interactive development envrionments (IDEs), JupyterLab integrates seamlessly with ‘git’
using the ‘JupyterLab-git’ extension powered by the JupyterLab-git module; this module is automatically
loaded if you choose more recent toolchains starting from 2023a. Once the session starts, a new ‘Git’ drop-down
menu is added to the top bar, in addition to a “version control” logo on the left sidebar. The VSC clusters where
this extension is supported are:
Using this extension you can create or clone a new git repository, manage your (new) branches, track your changed files in your trunk, commit your changes and push your changes to an upstream repository, in addition to more advanced functionalities.
Python iRODS Client#
You can use the Python iRODS client (PRC) to transfer data between your local storage, ManGO portal and/or the Tier-1 Data platform.
To integrate the authentication and data transfer steps together with your computation directly in
JupyterLab, you can choose to load the PRC module in the form.
The benefit of this choice is that you can skip loading the mango-auth and python-irodsclient
modules or install them locally, because they will be automatically loaded in your environment.
You will not need the iron CLI client either. The aforementioned modules are
available starting from the 2023a toolchain.
Authenticating to ManGO in your Jupyter notebook boils down to the following two lines of code:
from mango_auth import iinit
iinit('user_name', 'zone_name', 'host')
For details about the broad functionalities of the PRC in your Python or Jupyter notebook environment, please refer to the Python iRODS client documentation.