Data transfer using WinSCP#
Prerequisites#
To transfer files to and from the cluster, we recommend the use of WinSCP, which is a graphical ftp-style program (but than one that uses the ssh protocol to communicate with the cluster rather then the less secure ftp) that is also freely available. WinSCP can be downloaded both as an installation package and as a standalone portable executable. When using the portable version, you can copy WinSCP together with your private key on a USB stick to have access to your files from any internet-connected Windows PC.
WinSCP also works together well with the PuTTY suite of applications. It uses the keys generated with the PuTTY key generation program, can launch terminal sessions in PuTTY and use ssh keys managed by pageant.
Transfers to and from the VSC clusters#
The first time you make the connection, you will be asked to ‘Continue connecting and add host key to the cache’; select ‘Yes’.
When you first install WinSCP it should open a new session dialog. If that does not happen - start WinSCP and go the “Session” tab. From there choose “New Session”. Fill in the following information:
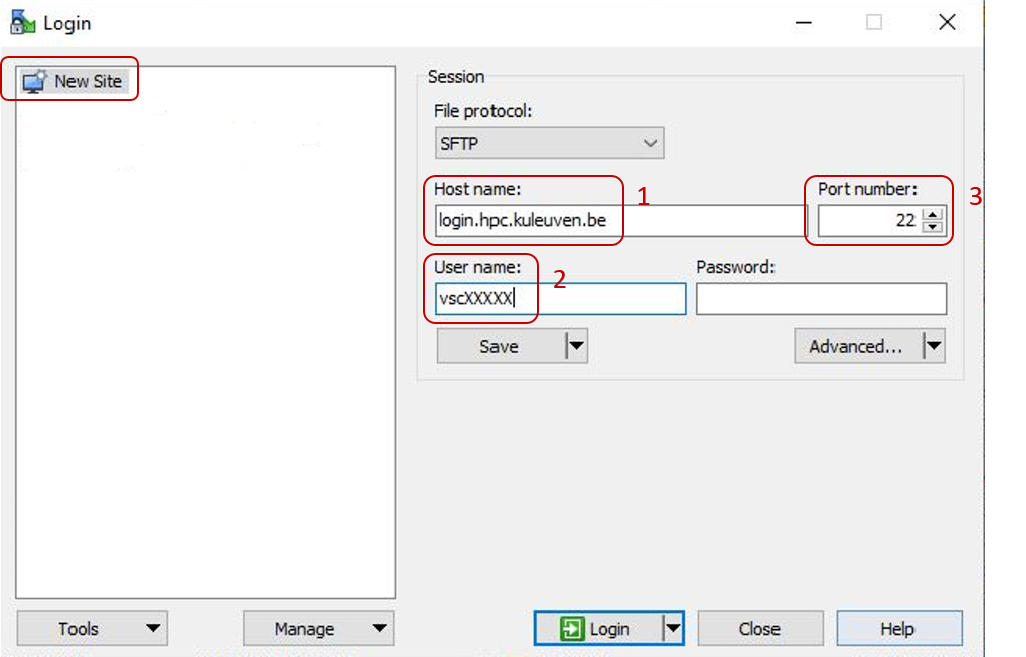
Fill in the hostname of the VSC login node of your home institution. You can find this information in the overview of available hardware on this site.
Fill in your VSC username.
Double check that the port number is 22.
If you are not using pageant to manage your ssh keys, you have to point WinSCP to the private key file (in PuTTY .ppk format) that should be used. You can do that using “Advanced” button and then choose “SSH” “Authentication” from the list. When using pageant, you can leave this field blank.

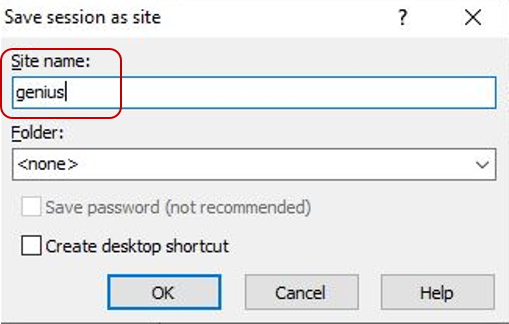
If you want to store this data for later use, click the “Save” button and enter a name for the session. Next time you’ll start WinSCP, you’ll get a screen with stored sessions that you can open by selecting them and clicking the “Login” button.
Click the “Login” button to start the session that you just created. You’ll be asked for your passphrase if pageant is not running with a valid key loaded. The first time you make the connection, you will be asked to “Continue connecting and add host key to the cache”; select “Yes”.
Additional options#
Two interfaces#
WinSCP has two modes for the graphical user interface:
The “commander mode” where you get a window with two columns, with the local directory in the left column and the host directory (remote directory) in the right column. You can then transfer files by dragging them from one column to the other.
The “explorer mode” where you only see the remote directory. You can transfer files by dragging them to and from other folder windows or the desktop.
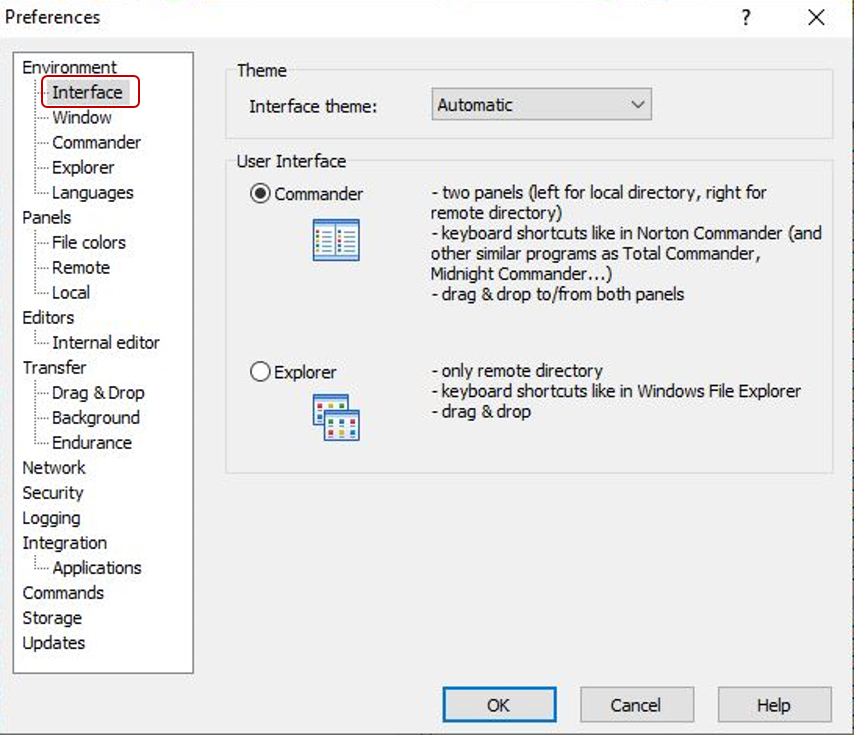
The default mode is “commander”. You can always switch the modes by going to the “Options” tab, choosing “Preferences” and selecting the \”Environment\Interface" category.
Enable logging#
When you experience trouble transferring files using WinSCP, the support team may ask you to enable logging and mail the results.
Enable logging:
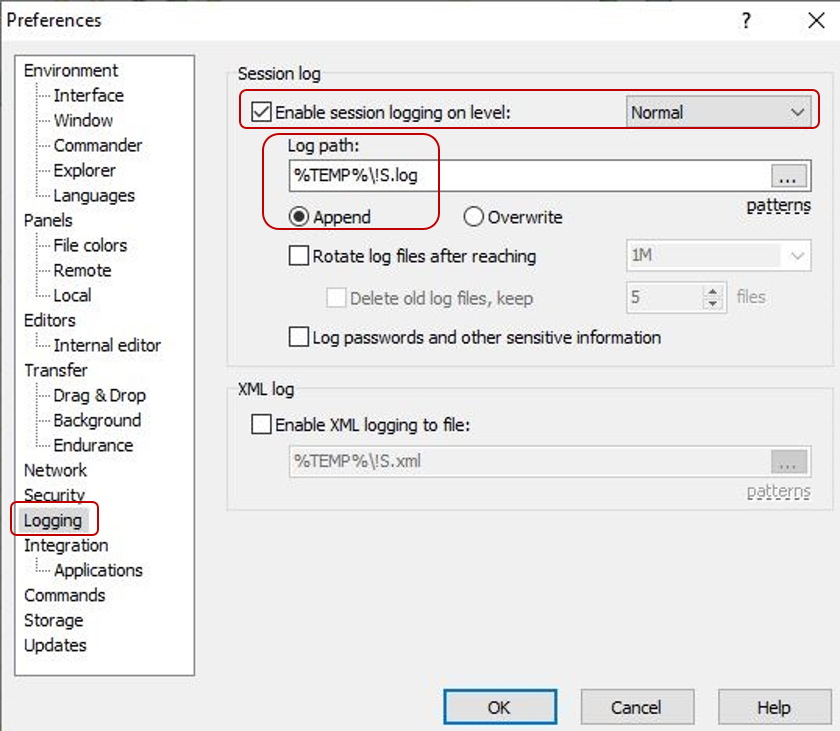
Go to the “Options” tab and choose “Preferences”.
Select the “Logging” category.
Check the box next to “Enable session logging on level” and select the logging level requested by the user support team. Often normal logging will be sufficient.
Enter a name and directory for the log file. The default is
%TEMP%\!S.logwhich will expand to a name that is system-dependent and depends on the name of your WinSCP session.%TEMP%is a Windows environment variable pointing to a directory for temporary files which on most systems is well hidden.!Swill expand to the name of your session (for a stored session the name you used there). You can always change this to another directory and/or file name that is easier for you to work with.
Now just run WinSCP as you would do without logging.
To mail the result if you used the default log file name
%TEMP%\!S.log:Start a new mail in your favourite mail program (it could even be a web mail service).
Click whatever button or menu choice you need to add an attachment.
Many mail programs will now show you a standard Windows dialog window to select the file. In many mail programs, the left top of the window will look like this (a screen capture from a Windows 7 computer):
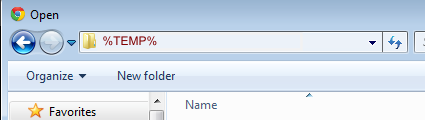
Click right of the text in the URL bar in the upper left of the window. The contents will now change to a regular Windows path name and will be selected. Just type
%TEMP%and press enter and you will see that%TEMP%will expand to the name of the directory with the temporary files. This trick may not work with all mail programs!Finish the mail text and send the mail to user support.