Running Windows VMs#
It is possible to deploy Windows VMs in VSC Tier-1 Cloud infrastructure.
VSC Terraform modules
provides a terraform module with an option for Windows. Simply use the Windows11 image and set is_windows = true. Please read our
Terraform section first to know how to use and modify
Terraform modules.
Note
The Windows11 image that VSC Cloud provides ignores the TPM Requirement. Any functionality that requires a TPM module will not function.
Deploy Windows VM with Terraform#
Windows VMs also require some extra steps after the Terraform deployment. After running:
terraform apply
It will take around 7 minutes or more to deploy the new Windows VM (the system should resize the disk and Windows NTFS partition). Wait until it is done.
Retrieve Windows admin password#
Windows Terraform template generates a random password to login the first time as Admin user in your Windows VM.
You can see this password when you run terraform apply or terraform output.
It will output something like MyVM = "xfreerdp /u:admin /port:59405 /v:193.190.80.3 /p:yourpassword".
You can also retrieve the password from
VSC Tier-1 Cloud dashboard, just login with your
VSC account and go to Compute->Instances and click on your Windows Instance Name
(by default MyVM-windows if you didn’t change the name).
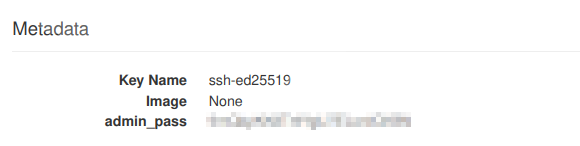
Click or select the Overview tab, you will see the Windows admin password
(admin_pass) from Metadata section below:
Warning
Any user with access to the project can see the password in the metadata of the VM. You can change the password in windows settings if necessary. Make sure to write down the password, since we cannot help you reset it if you lose it.
At this point you can use Windows Remote Desktop (RDP) with your new admin user and password to connect to your VM.
Note
Remember: use terraform output to get the connection details for your VM
(please see Terraform section for more details).
Note
Take into account you should upgrade your Windows OS after the first boot. You should activate your Windows machine with a valid key as well.
Creating your own Windows image#
It is possible to customize and upload your own windows image. The guide below is a semi-automated method of doing so.
Preperation#
Download the latest stable virtio driver: https://fedorapeople.org/groups/virt/virtio-win/direct-downloads/stable-virtio/
Save as
virtio-win.isoDownload the latest windows iso, save as
Windows.iso
Configure/Download the unattended install iso: https://schneegans.de/windows/unattend-generator/ (link includes recommended configuration)

Creating the image#
Create the disk:
qemu-img create -f qcow2 windows.qcow2 40G
Install windows on the disk, mounting all the required drives:
virt-install --connect qemu:///system --name windows --ram 6144 --vcpus 2 --network network=default,model=virtio --disk path=windows.qcow2,format=qcow2,device=disk,bus=virtio --cdrom Windows.iso --disk path=unattend.iso,device=cdrom --disk path=virtio-win.iso,device=cdrom --vnc --os-variant=win10
Or --os-variant=win11 for win11.
Windows setup#
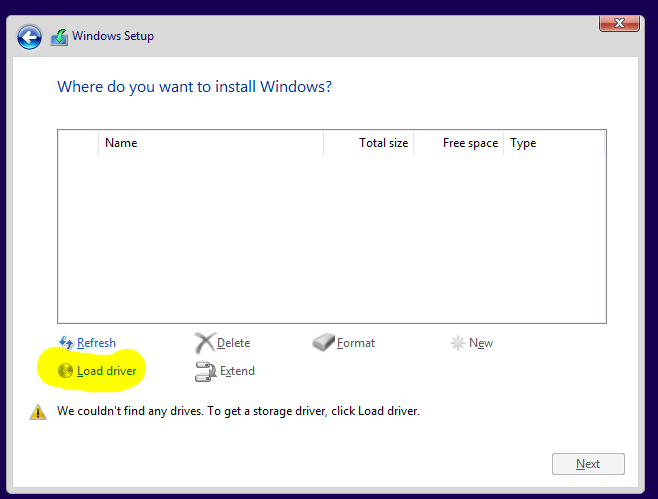
Most windows setup options are taken care of by unattend.iso except the partitioning.
Drivers#
In the partitioning window, click load drivers and browse to NetKVM\w10\amd64 on the virtio drive and select that folder. (Obviously select w11 if on Windows 11), then next.
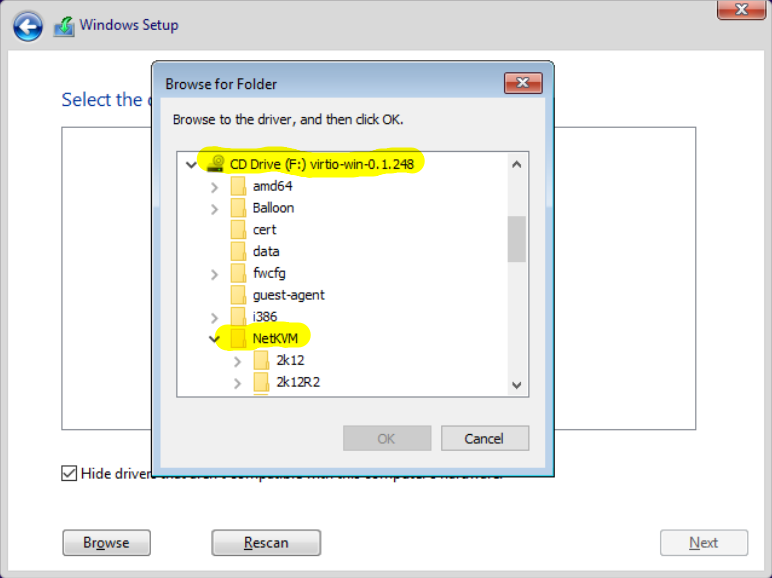
Do the same for viostor\w10\amd64.
You should now have acccess to the internet and be able to see the virtual hard drive. Click next and let windows install.
Configuring windows#
After some time, Windows will start. unattend.iso runs these actions:
import the viostor drivers (not sure if necessary)
enable unrestricted powershell for cloud init
Download and run cloudbase cloud-init
Wait for the download to complete.The cloudinit wizard will appear automaticaly.
Before continuing, make any changes to the OS you would still like to make, as those will be included in the final image.
When you’re ready, follow the install wizard. In the configuration options screen, make sure to set COM1 as the logging port. Everything else can be left default.
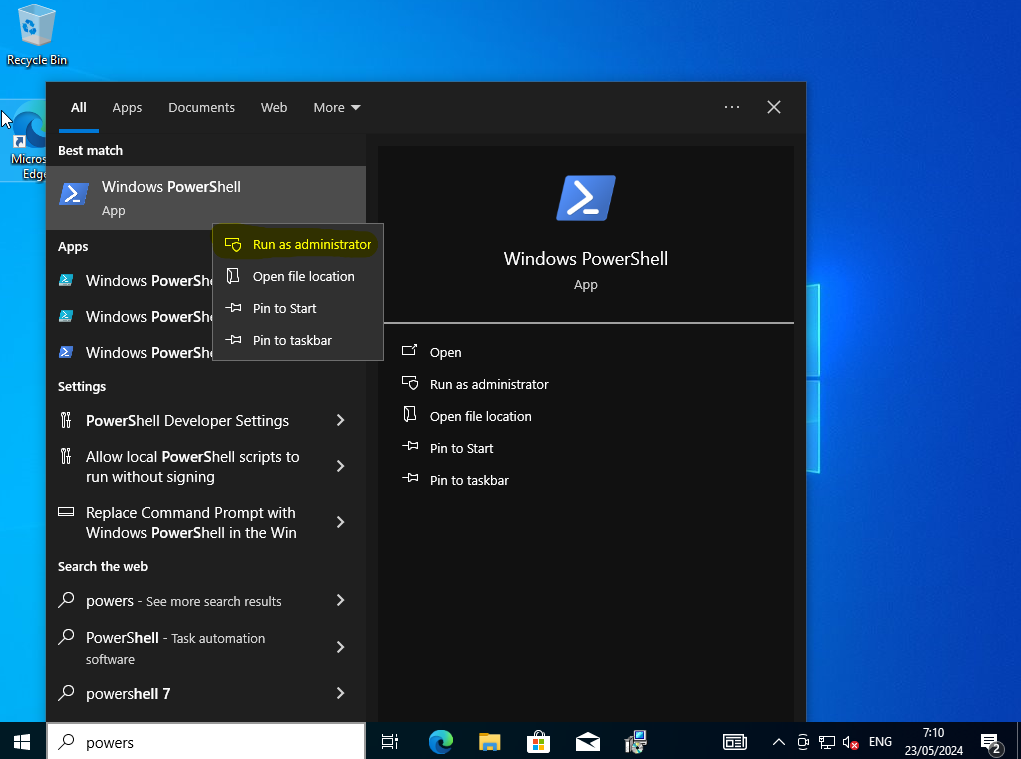
Before starting sysprep, open powershell as administrator (click start menu, type powershell and rightclick) and execute C:\Windows\cloudconfig.ps1.
Uploading the image#
Finally, upload the image with
OS_CLOUD=openstack openstack image create --disk-format qcow2 --file windows.qcow2 Windows10-example
Using the image#
Make sure to set is_windows = true in your VM definition if you’re using the terraform templates.